In an increasingly connected world, reliable internet access is no longer a luxury; it’s a necessity.
For many, especially those in remote or underserved areas, Starlink satellite internet offers a groundbreaking solution. READ FULL STORY
However, setting up Starlink isn’t just about plugging in a device and hoping for the best.
To truly harness the power of this innovative technology, it’s essential to approach the installation process with care and attention to detail.
In this article, WoK seeks to guide you through the essential steps to set up your Starlink satellite internet the right way.
How does Starlink satellite internet work?
Starlink utilizes a network of thousands of small satellites orbiting the Earth at a relatively low altitude of about 340 miles (550 km).
There are over 4,000 Starlink satellites in orbit, with plans to launch up to 42,000 in the coming years, in a move to ensure widespread coverage and connectivity.
To facilitate the connection between the satellites and the internet, Starlink employs ground stations located around the world.
These ground stations connect the satellites to the internet backbone, allowing for data transmission.
When a user sends a request for data, the signal travels from their satellite dish to a nearby satellite, which then relays the information to a ground station.
The ground station retrieves the requested data from the internet and sends it back through the satellite network to the user’s terminal.
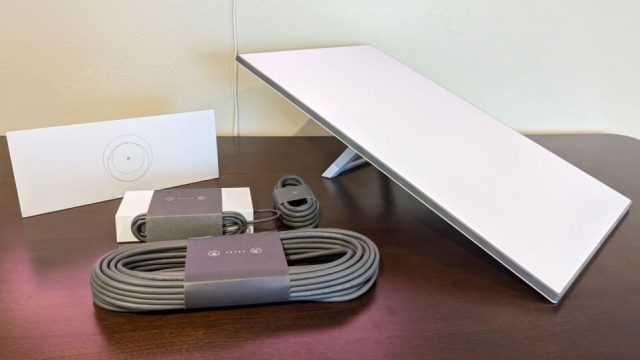
Users of Starlink receive a kit that includes a satellite dish, a mounting tripod, a Wi-Fi router, and all necessary cables.
The dish must be positioned with a clear view of the sky to ensure optimal performance.
Once installed, the dish connects to the router via an Ethernet cable, enabling users to access the internet wirelessly.
How to set up Starlink satellite internet
Choose a location
Selecting the right location for your Starlink dish is crucial for optimal performance. The dish requires a clear view of the sky to connect effectively to the satellites overhead.
Look for an area that is free from obstructions such as trees, buildings, or other structures that could block the signal. Ideally, the dish should be placed on a roof or a high point in your yard.
To assist you in finding the best spot, download the Starlink app, which provides a feature that helps you visualize satellite coverage in your area.
The app will suggest the most suitable locations for installation based on your geographical position.
Unbox and assemble
Once you’ve chosen the perfect location, it’s time to unbox your Starlink kit. Inside the box, you will find the satellite dish, a mounting stand, the Wi-Fi router, and the necessary cables.
Carefully remove each item and ensure that you have all components before proceeding. The dish comes with a mounting stand that can be adjusted for optimal positioning.
Follow the assembly instructions included in the package to attach the dish to the stand securely. It’s important to ensure that the dish is stable and can withstand wind or other weather conditions.
Connect the equipment
After assembling the dish, the next step is to connect it to the router. Use the provided cable to connect the dish to the router, ensuring that the connections are secure.
Once the dish is connected, plug the router into a power source. The router will power the dish and provide Wi-Fi connectivity to your devices.
It’s advisable to place the router in a central location within your home to maximize Wi-Fi coverage.
Make sure that both the dish and the router are positioned in a way that allows for good ventilation and is not exposed to excessive moisture.
Activate via app
With your equipment set up, it’s time to activate your Starlink service. Open the Starlink app on your smartphone or tablet.
The app will guide you through the activation process, which includes creating an account and entering your service address.
Follow the on-screen instructions, which may include adjusting the dish’s position for the best satellite connection.
The activation process typically takes about 30 minutes, during which the dish will calibrate itself. Once activated, you can customize your Wi-Fi network name and password through the app.
After setup is complete, you should be able to connect your devices to the Starlink network and enjoy high-speed internet access.


